If you’ve got a thing for old bikes (1990’s) chances are you’ve had a few situations where you cannot find the parts you need or just can’t justify the cost of simple components.
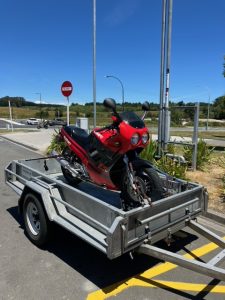
I recently bought a 1990 Honda CBR250 MC22 which was written off by insurance, with the intention of fixing it up and getting it road legal. Among other minor fixes such as the front fairing requiring some fibre glassing, one of the headlights was missing and needed replacing. I thankfully found a cheap unit via BikeBitz which even had the springs and mounting hardware for around $50, not bad!
My nightmare started when I needed a headlight bulb for the MC22. I took out the bulb from the existing unit and saw that it was a 35/60W unit, “H4R” type. It got worse when I started hunting for H4R bulbs and saw that they cost over $30 each! I then decided to try find and H4 bulb, however all bulbs on the market in NZ were 55/60W bulbs or even greater wattage. This means the low beam circuit will be drawing 55W instead of the 35W that the MC22 is designed for. This has the potential to melt wiring and even destroy the charging system so it wasn’t a route I was prepared to take. During some googling I came across a few threads that showed the physical differences between the H4 and H4R bulb, the mounting tabs on the H4 Differed to the H4R as you can see below.
The forums also talked about a way of retrofitting the H4 bulb into the H4R socket with the use of a thin strip of metal or stiff wire. You can see in the picture below where the mounting cut-outs are for the H4R. If you try fit an H4 bulb, the two smaller prongs will contact the higher portion of the plastic ring. The top tab slots in place just fine.

I decided to pull the trigger and buy a pair of H4 35/35W bulbs from Ebay. The difference between the 35/35W bulb and the 35/60W bulb will be that at high beam the light will project further ahead, however the power will be quite low. This won’t really make a difference as the MC22 has terrible headlights even with the stock bulb that puts out 60W supposedly on high beam.

Once the bulbs arrived, I got to work. I got a few split pins from Anzor Fastners, it cost me less than $2 for 4.

The first thing to do is to bend the tabs as shown below then open the split pin up into a V shape
Insert the split pin into position as below and then bend the tabs completely over the split pin. It’ll take some effort. Also make sure you push the tabs so they are square and not sticking out, it is a bit hard to explain but basically you want the metal tabs to not touch the raised plastic edge of the headlight housing, so push against the metal as shown by the arrows so the edges are flush.
Trim the wire so about 7mm is left on either side. Better to leave more than less so you can adjust as required.

Once you’re done, you can mount the bulb. The tricky part now is to get the metal locking wire to keep the bulb in place. You can see in the pictures below how the new tabs you’ve made sit in place on the headlight housing. I found it easier to loosen the metal plate that the locking wire seats under, fit the wire and then tighten the screw back up
Great job!
All done! Less than $5 and my bike is finally ready for compliance. It’s amazing what a bit of googling can help you achieve, considering I was looking down the barrel of $60 if I bought the bulbs here in New Zealand. This is part of the reason why NZ businesses whine about losing customers to internet shopping.